The first step is to record your temporary message in an instruction mailbox. In this case we are using instruction mailbox 803 (003). Before you record a new message in mailbox 803 make sure that it is not being used by choosing the “listen option” before re-recording. This is assuming you have a TelephoneSystemsDirect.com NEC DSX phone system consult with your telecommunication manager before making any changes. For further assistance call 866-898-2303 option 3.
STEP 1: PRESS ICM, DIAL 700.
“please enter the mailbox number”
STEP 2: DIAL 300
“you have no new messages”
STEP 3: DIAL 72
“welcome to the system administrator menu”
STEP 4: PRESS THE BUTTON UNDER INST (OR NEXT TO INSTRUCTION ON A 34-BUTTON SUPER DISPLAY PHONE)
“please enter the mailbox number for the instruction menu”
STEP 5: DIAL 803 (may be 003 on older systems)
“press r to record an instruction menu”
STEP 6: PRESS THE BUTTON UNDER REC
“start recording when you hear the tone, press the # key when you are done”
Thank you for calling. Our normal operating hours are Monday through Thursday 9:00 am to 4:30 pm and Friday 9:00 am to 3:00pm. To leave a message press 1, and you will be contacted as soon as possible. Thank you for calling.
STEP 7: PRESS THE BUTTON UNDER DONE OR #
STEP 8: PRESS THE BUTTON UNDER EXIT AND HANG UP
Once your greeting is recorded you need to set it as the override mailbox:
STEP 1: PRESS ICM, DIAL 700.
“please enter the mailbox number”
STEP 2: DIAL 300
“you have no new messages”
STEP 3: DIAL 72
“welcome to the system administrator menu”
STEP 4: PRESS 6 FOR ANSWER SCHEDULE OVERRIDE
“please enter the table number”
STEP 5: PRESS 1
“Answer schedule over ride is off…”
STEP 6: PRESS THE SOFTKEY UNDER ON, PRESS THE SOFTKEY UNDER MAILBOX AND ENTER 803 (003 on older systems)
STEP 7: PRESS THE SPEAKER BUTTON TO HANG UP
Don’t forget to turn answer schedule override off when you return to the office. This can be done by following the above steps and choosing OFF at step 6.
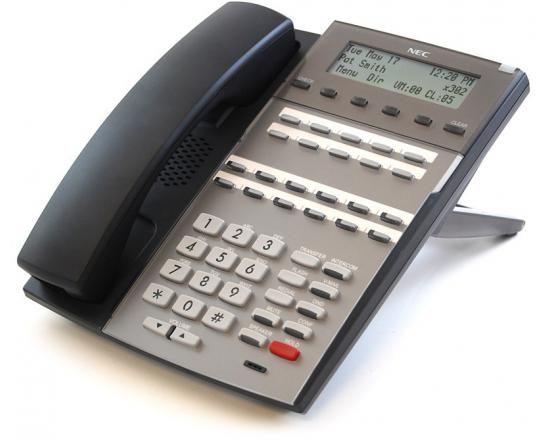
NEC DX7NA-22BTXH DSX 22B Black Display Phone
The NEC DX7NA-22BTXH DSX 22B Black Display Phone features a large 3 line-by-24 character alphanumeric display with 4 Interactive Soft Keys for intuitive feature access.
This is a refurbished product.

Technical Support
Need help? Our technical support staff is certified on all Samsung, NEC DSX, NEC SL1100, NEC SL2100, NEC SV8100 and NEC SV9100 telephone systems. We can walk you through programming changes or troubleshooting over the phone or connect to your telephone system remotely.